Keep your kitchen cool by moving your roasts out onto the grill
Overview
A big, glorious piece of meat makes an impressive presentation (apologies to vegetarians), and yet a roast can be one of the simplest dishes to prepare, leaving time and psychic energy for more elaborate appetizers, desserts and conversation with guests.
“But it’s summer,” you say. “And it’s hot! Who wants to crank up the oven?”
Not me, which is why in hot weather, I move my roasting outside to my grill. Cooking a roast on the grill is a chill way to make a grand main course.
Before you launch into your grill-roasting, you need to reframe your relationship with the grill itself.
Cooking a roast is not like cooking burgers or barbecuing chicken, where you’re seeing the fire and engaging with it in an ongoing way. With a roast, your grill is now your oven, albeit one that is fired by burning charcoal (or the jets in your gas grill). The same principles of convective heat that cook food in your oven now apply to the grill.
[A dry marinade and two-zone grill are the one-two punch of great grilling]
The challenge with this cooking technique is to create steady, predictable heat so that the interior of the roast cooks properly without the exterior getting overdone. Keeping three things in mind will help you accomplish this.
Take your meat’s temperature. The first step is to moderate the temperature of your meat before you put it on the grill. If the meat is ice-cold, direct from the refrigerator, it will take more time for the center of that meat to get to temperature, meaning the outside of the roast is at risk of overcooking.
Scale and get a printer-friendly version of the recipe here.
I like to take my roast (which, for this recipe, is a 3-pound, boneless pork loin) out of the fridge at least one hour before cooking, which lets the meat rise in temperature about 15 degrees, without any food safety risks. The USDA advises that raw meat should not be left out for more than two hours. (If your kitchen is over 90 degrees, don’t exceed that 1 hour of rest.)
To gauge your roast’s temperature, insert your instant-read thermometer into the center. Take a reading right out of the fridge and again after an hour or so.
Take your grill’s temperature. The most important part of this grill-roasting process is setting up your fire so that the roast is receiving the lovely warmth from the heat source — coals or gas jets — without being directly over them.
With my basic round kettle-style grill, I move the hot coals to the perimeter and place the roast right in the center, with no coals underneath. This creates even heat all around the roast. Use an oven thermometer to determine that the level of heat inside the grill is optimal.
[Ready, set, grill: A guide to outdoor cooking]
Use the lid to create an outdoor oven. The next step is to close the lid, and this is what defines grill-roasting. You need the lid to create convection heat; the domed shape of a kettle grill lid is ideal. With the fuel on the bottom and the lid creating a closed chamber, the heat flows up and around the whole interior of the grill, bathing the roast in hot air … just like a regular oven.
Unlike an oven, however, you can’t just set the temperature to 375 degrees and have it stay there. With grill-roasting, your initial setup will determine how the temperature is maintained throughout cooking, and you may need to do some adjusting here and there.
[Chill out this summer with piña coladas, frozen Irish coffees and other blended cocktails]
Once again, a strong motivation to buy an instant-read thermometer, if you don’t already have one. I splurged this year and bought myself a Thermapen … not cheap, but it’s very quick to register temperature, sturdy, has an easy-to-read digital display (even without my glasses), and I got a robin’s egg blue one that makes me happy every time I take it from the drawer.
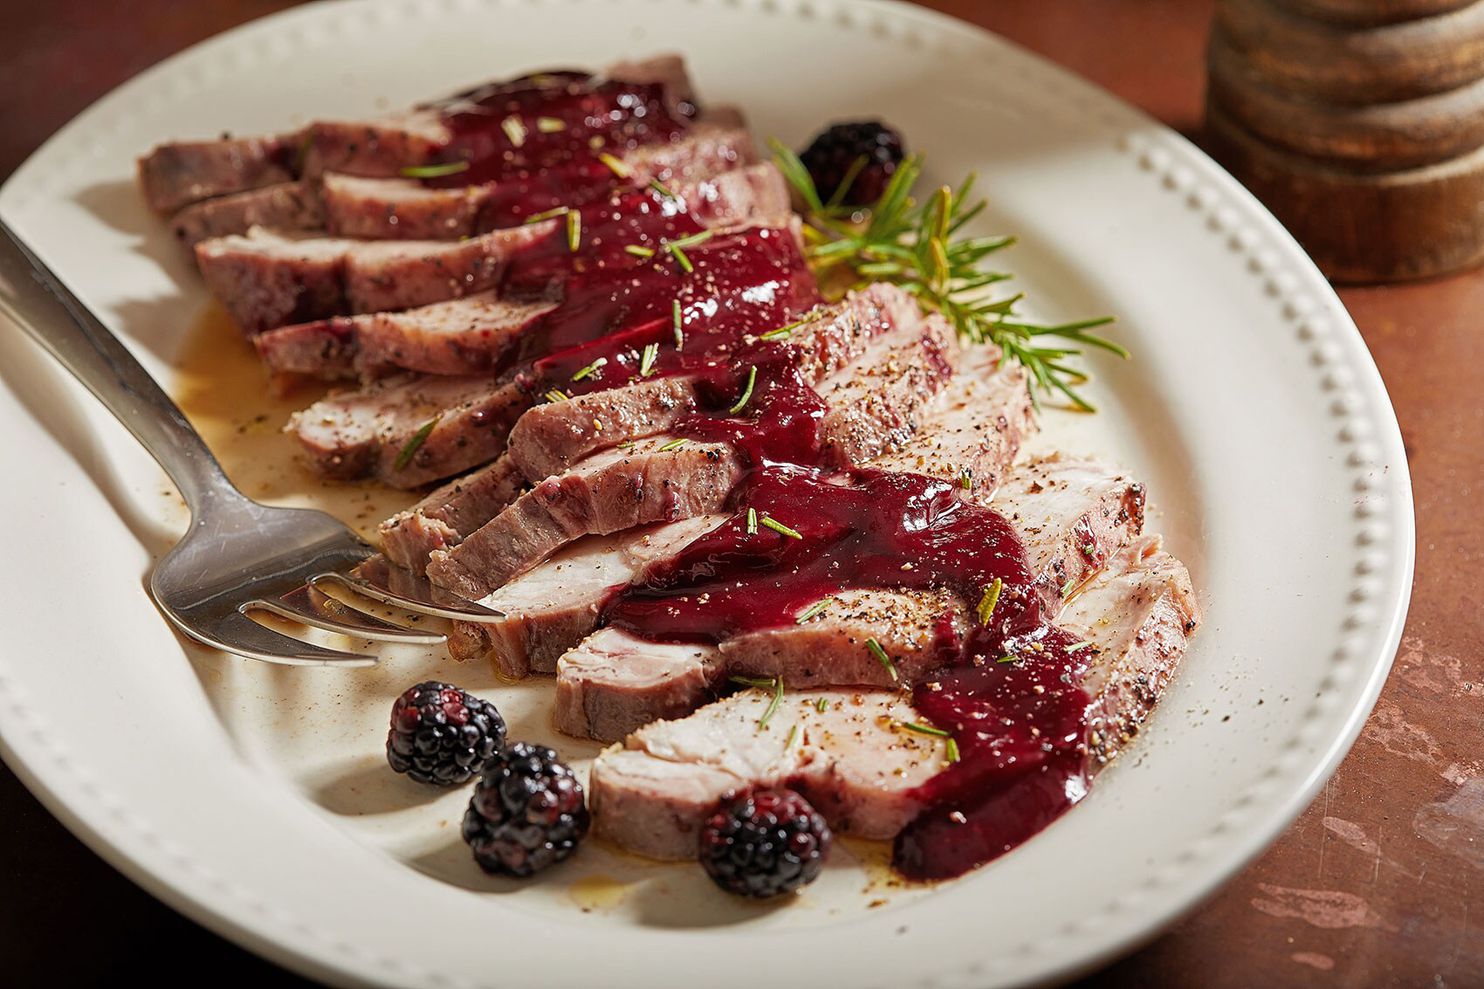
A fruity sauce makes you forget about gravy. Grill-roasting does have one disadvantage: no gravy. You’re not collecting pan juices with which to make a pan-sauce or gravy, but that just opens the door to other delicious options. I love pork with fruit, and at this point in the summer, berries are in abundance, so I’m pairing my roast with a sweet-savory blackberry sauce. The berries bring fruity depth, while shallots, rosemary and a shot of balsamic vinegar keep the sauce from being too sweet.
You could grill your roast and serve it “naturally,” with just a coating of salt and pepper — delicious, but maybe not super exciting visually (unless you’re a fan of beige) — but I like to glaze the roast with the blackberry sauce for the final few minutes of cooking, which glosses the exterior and adds flavor.
I then serve more sauce on the side for people to apply as they like. The sauce keeps nicely in the fridge for at least a week. Slather some on a crusty roll with a touch of mayonnaise and slices of cold grill-roasted pork for a fine sandwich.
Leftovers for lunch are another glorious benefit from a roast.
Grill-Roasted Pork Loin With Blackberry Sauce
The sauce recipe makes about 2/3 of a cup. If you want to spread some on the loin while grilling and have more to serve tableside, double the recipe.
Ingredients
FOR THE PORK LOIN
1 (3-pound) boneless pork loin
Extra-virgin olive oil
Kosher salt
Freshly ground black pepper
FOR THE SAUCE
2 tablespoons extra-virgin olive oil
1/4 cup finely chopped shallot (from 1 medium shallot) or onion
2 garlic cloves, chopped
1 teaspoon chopped fresh rosemary, plus more for garnish
1/8 teaspoon crushed red pepper flakes, or more to taste
1 pint fresh or frozen blackberries (about 10 ounces), plus more for garnish (see headnote)
3 tablespoons pure maple syrup
2 tablespoons balsamic vinegar, or more to taste
2 tablespoons packed light brown sugar, or more to taste
1 teaspoon kosher salt, or more to taste
1/2 teaspoon dry mustard
Freshly ground black pepper
Steps
Step 1
Let the pork loin sit at room temperature for about 1 hour.
Make the sauce: While the pork is resting, in a medium saucepan or skillet over medium-high heat, heat the oil until shimmering. Add the shallot, garlic, rosemary and crushed red pepper flakes and cook, stirring frequently, until the shallot and garlic are tender and fragrant, about 4 minutes; adjust the heat if the shallot or garlic start to brown.
Step 2
Add the blackberries, syrup, vinegar, brown sugar, salt and mustard and stir to combine, crushing the berries with a spoon or rubber spatula to start releasing the juices.
Adjust the heat so the mixture is at a lively simmer and cook until the blackberries collapse and the mixture thickens slightly, stirring frequently, 10 to 15 minutes. (This will take a few minutes longer if you are using frozen blackberries.)
Step 3
Transfer the sauce to a blender and process until smooth. Strain through a sieve back into the saucepan, pressing and scraping the blackberry pulp to remove the seeds while pushing the pulp through. (You could skip this step, but your sauce will be seedy.)
Gently reheat the sauce, season generously with the pepper, taste, and adjust, as needed, with more salt, red pepper flakes, brown sugar and/or vinegar. The sauce should be a balance of sweet, sour and salty with a hint of chile heat. Remove from the heat.
Step 4
Prepare the grill: If using a gas grill with three burner zones, heat the left and right zones to medium-high and leave the center off. With two burner zones, heat one to medium-high and leave the other one off.
If using a charcoal grill, fill a chimney starter with charcoal, light it, and when the coals are red hot, dump them into your grill (keep the cooking grate off for now). Add more charcoal — you will need about 8 pounds total if using regular charcoal briquettes (one medium bag), possibly more if using hardwood charcoal chunks.
When all the coals have ashed over but are still very hot, scoot them into a ring around the edge of your grill, leaving an empty spot in the middle. If your grill is too small to allow for the empty spot, scoot the coals to one side, leaving the other side empty.
Replace the cooking grate, and set an oven or grill thermometer on top. Cover the grill.
Step 5
Rub the pork with a light film of oil and season generously all over with salt and pepper. (Remember that a lot of the salt will drop off during cooking, so don’t be shy.) Check the internal temperature of the raw pork for reference; ideally, it will register around 55 degrees.
Step 6
Check the temperature inside the grill; you want it between 450 and 500 degrees. If it is too cool, add more coals and wait until they have ashed over. If too hot, wait a few minutes. If using a gas grill, you want the temperature at 400 degrees.
When the grill temperature is in range, place the pork on the grill, fat side up. Cover the grill.
Step 7
Roast the pork undisturbed for about 20 minutes, then check the temperatures (try to do this quickly so you don’t lose a lot of heat): the pork should be around 110 degrees and the “oven” will have dropped to around 400 degrees. If using a gas grill, adjust the burners so the temperature inside the grill is about 350 degrees.
Step 8
Continue to cook an additional 10 minutes and then brush a generous layer of the blackberry sauce over the pork (unless you prefer to leave the pork “natural” and serve the sauce on the side). Don’t try to get the sauce on the underside of the pork.
Continue cooking 5 additional minutes or so, to let the glaze start to set, and check the internal temperature of the pork. When it reaches 130 degrees in the center, transfer it to a serving platter, taking care not to disturb the glazed surface; tent it loosely with foil. (If you have a cutting board with a channel that holds juices, you can go directly to the cutting board; the goal is to capture all the juice.)
Step 9
The internal temperature of the roast will continue to rise about 10 degrees once off the grill. A final temperature of 140 degrees will give you juicy, slightly pink pork. If prefer it medium, with less pink, keep it on the grill until the internal temperature registers around 135 degrees, but cooking it much longer will give you dry pork.
Let the roast rest about 10 minutes, then transfer to a cutting board, keeping the juices on the serving platter. While the pork is resting, gently reheat the sauce, if serving on the side.
Step 10
Carve the pork into 1/4-inch thick slices and arrange on the platter, spooning any accumulated juices over the meat. Season the slices lightly with salt. Toss a few fresh blackberries or fresh rosemary pieces onto the platter, if desired.
If serving the blackberry sauce at the table, either pour it in a thick ribbon over the pork slices or serve on the side.
From cookbook author and editor Martha Holmberg.
Tested by Ann Maloney; email questions to voraciously@washpost.com.
Scale and get a printer-friendly version of the recipe here.
Did you make this recipe? Take a photo and tag us on Instagram with #eatvoraciously.
Browse our Recipe Finder for more than 9,000 Post-tested recipes at washingtonpost.com/recipes.
More summery cooking ideas from Voraciously:
Here’s how to transform coleslaw from cookout supporting player to star
Summer is for grilling corn. Here are four ways to do it.
Grilled Tofu with Ginger-Cilantro Sauce
Nutrition
Calories: 396; Total Fat: 13 g; Saturated Fat: 3 g; Cholesterol: 150 mg; Sodium: 394 mg; Carbohydrates: 19 g; Dietary Fiber: 3 g; Sugars: 14 g; Protein: 52 g.