How to preserve summer tomatoes so you can enjoy them all year long
Overview
When I planted Mortgage Lifter, Mr. Stripey, German Red Strawberry, Early Girl and Roma seedlings in my backyard, I had dreams of filling baskets with sun-ripened tomatoes. I imagined jars of canned tomatoes cooling on the kitchen counter as well as a winter filled with a sense of self-sufficiency and just a little bit of gloating.
Instead, the squirrels and I have had our battles. There will be no moments of happy homesteading. I harvest one or two tomatoes a day and the little monsters snack on the rest. If squirrels, bunnies or groundhogs have invaded your garden, take heart: It’s been a banner year for small farmers. Summer tomatoes are abundant, delicious and at a good price.
It is a great time to start a tomato canning tradition.
[This reliable jam recipe will let you savor the best berries and stone fruit year-round]
Tomatoes are the most useful ingredient in my pantry, particularly through the winter when many cold-weather recipes call for a can of them. In my dinner rotation, sauces, stews, soups, enchiladas, pizzas and parms all use them. It’s such a relief to give up lugging home heavy cans from the grocery store and, instead, reach into the pantry for my own home-preserved version.
If you’re new to canning, here’s some advice:
Select tomatoes that are ripe or slightly underripe, cutting out any black spots or bruises. Slicing tomatoes such as Brandywine, Beefsteak and Big Red are the most commonly preserved, while Roma tomatoes are another excellent choice — all are meaty varieties with thick walls and small seed sacks. Heirloom tomatoes are fine, but often have a higher water content and may result in a watery flavor once canned. Red tomatoes are prettiest in the jar, but a mixed bunch of every shape, color and size also works well, with the exception of grape or cherry tomatoes, which are too hard to peel.
Clear the counters and make room. This is a big, messy job that starts with placing the largest pots, pans and bowls into an assembly line and ends with cleaning the kitchen.
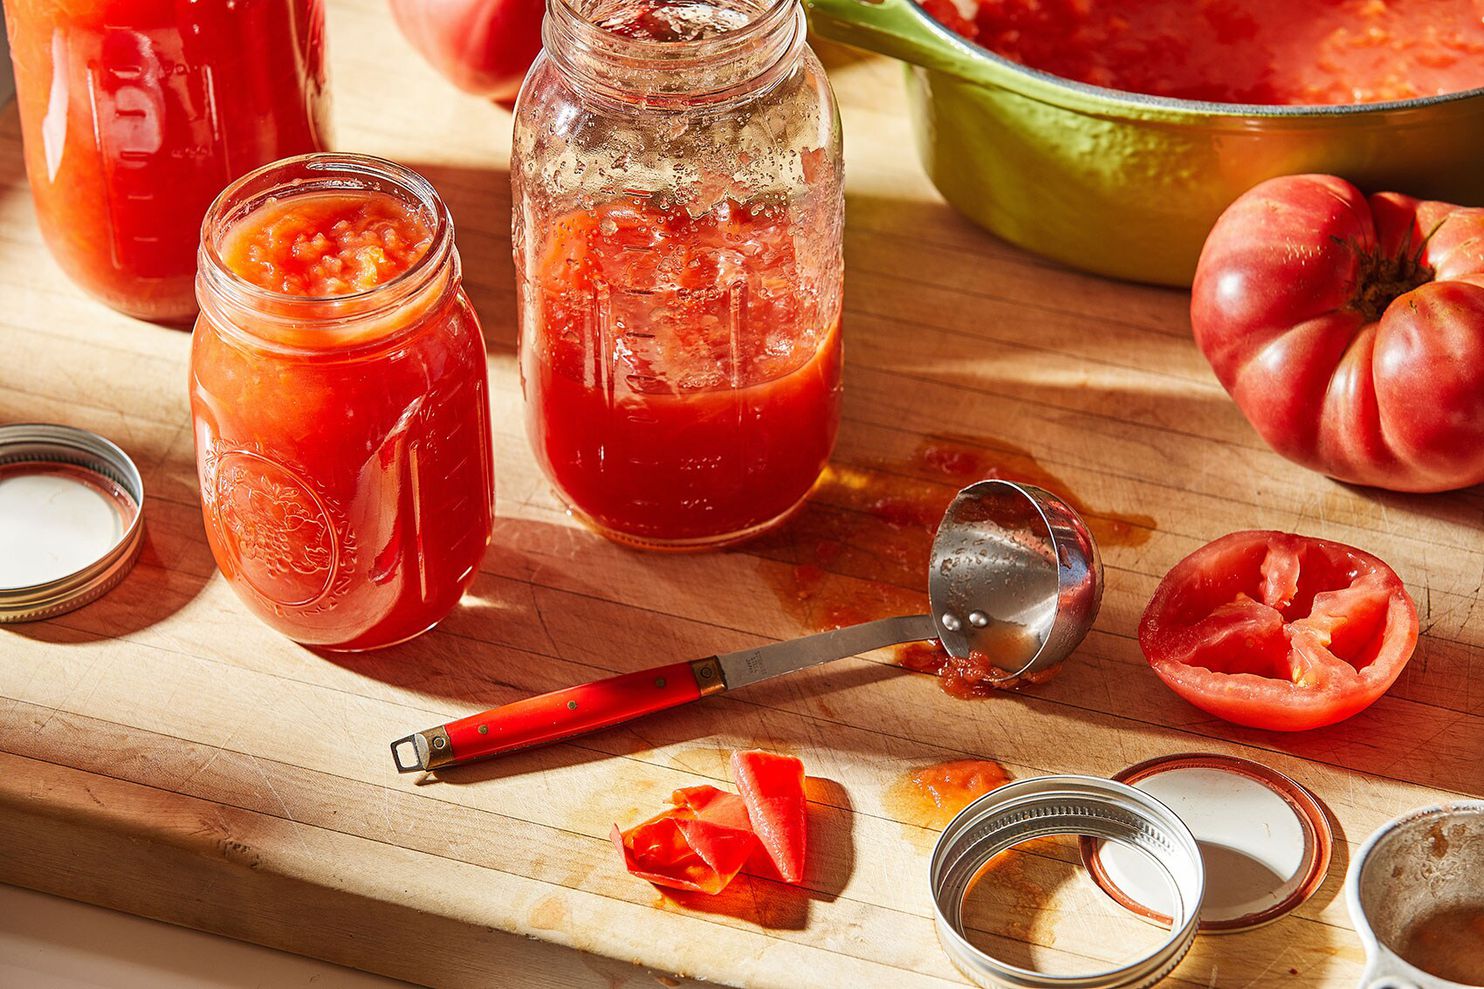
Remove seeds and skins. They may turn bitter in the jar. Remove the skin by blanching: Slice an X through the base and dunk in boiling water, and the peel will lift off in satisfying swaths. Plunge your fingers into the cells, scooping and discarding the seeds and gel. Then tear the remaining tomato flesh into large pieces.
[If you put up, don’t shut up. Talk to the farmers who are growing your food.]
Crush the tomato pulp. Crushed canned tomatoes can separate into liquids and solids in the jar. This does not affect the tomatoes’ usefulness, but it isn’t as pretty. I crush, smash, tear and combine the pulpy and watery tomato meat until it’s a cohesive, chunky mixture, then begin cooking those crushed tomatoes — about a quart at time — as I continue peeling, seeding and tearing the rest. Essentially, I’m a one-person band concurrently banging the cymbal, playing the harmonica and fiddling. This is the big work of tomato canning and shouldn’t be rushed.
Adjust acidity. Safe water bath canning relies on preserving foods with dependably high acidity, measured as pH. Because tomatoes have a wide-ranging pH, bottled lemon juice or citric acid is used to adjust the mixture to a safe level. Citric acid is a shelf-stable synthetic version of the naturally occurring compound found in citrus.
Salt is not needed for preservation, but may be added for flavor. Use only kosher or fine sea salt, not iodized, which can add a metallic aftertaste.
[Water Bath Canning Step-by-Step]
Use what you have. The greatest yield will come from blanched, peeled and seeded, hand-crushed tomatoes. Canning does not require special equipment. It is possible to preserve pint jars in a large stockpot, fashion a rack for the bottom of the canner from a cake rack and to use a cooler for an ice bath. Two tools I highly recommend: a jar funnel and a rubber-coated jar lifter. I’ve used a measuring cup to add ingredients to jars, and I’ve McGyver’d a tool to help lift hot jars from the boiling water by twisting rubber bands around the ends of kitchen tongs, but the two low-cost tools are safer to use.
Veteran canners rely on special kitchen tools to make the preserving process easier. For example, a food mill processes quartered, cooked-until-tender tomatoes, removing seeds and skins for a smooth sauce. The near-legendary, budget-busting Squeezo is a grinder that removes peels and seeds and melds the textures for ideal crushed tomato consistency.
Tomato preservation is a task best shared with family or friends, but if working on your own, you will still end the day in a kind of exhausted glory and with a pantry full of summer’s bounty.
[Canning basics: What you need to get started]
Troubleshooting: Never add anything except lemon juice or citric acid and salt to the jar. Adding meat, garlic, mushrooms, peppers, onions, herbs or spices will alter the pH and will render the contents dangerous for consumption.
After processing, if the tomato water and pulp separate in the jar, the liquid rising to the top, the tomatoes were not crushed enough or were added to the pot too quickly. It does not affect the taste or the shelf-stability at all. Shake the jar before using.
Any tiny amount of food left on the rim of the jar before placing the lid can interfere with the seal. Clean the jars meticulously before covering.
Do not move the jars from the water-bath canner too quickly. Allow them to rest in the canner for 10 minutes to slow the boiling inside the jar. Vigorous boiling can trigger siphoning; the contents may bubble up and lift the lid, breaking the seal.
After processing, any jars with failed seals should be refrigerated and used within 2 weeks.
Canned Crushed Tomatoes
Almost any tomato can be canned, but meaty types such as Brandywine, Beefsteak, Big Red and Roma varieties are preferred.
Storage: The jars can be stored in a cool, dark place for up to 18 months.
Where to buy: Canning supplies are available at hardware stores, groceries and online.
Ingredients
25 pounds ripe but firm tomatoes (about 30 to 45, depending on size, see headnote)
About 4 teaspoons (28 grams) citric acid or 1 cup (240 milliliters) bottled lemon juice
Kosher or fine sea salt (optional)
Steps
Step 1
Set up for water-bath canning (see related recipe). Fill the largest bowl in your kitchen or a 15-quart capacity cooler with ice water.
Set up 2 large bowls: One for the tomato cores, peels and seeds and the other for the crushed tomatoes.
Step 2
Bring a large pot of water to a boil over high heat and reduce the heat so the water is at a steady simmer. Slice an X just through the skin at the bottom of each tomato. Gently slide a few tomatoes at a time into the boiling water for 30 to 60 seconds (depending on the size and ripeness of the tomato).
Step 3
Continue with the remaining tomatoes, letting the water return to a steady simmer between batches and blanching a few tomatoes at a time. The tomatoes will float to the surface at about the same time the peel has loosened. As they bob up, use a slotted spoon to transfer them to the ice bath to stop the cooking.
Step 4
Working over one large bowl, core and remove the peel from the tomatoes. Cut out any bruises or black spots. Halve the tomatoes and, using your fingers, scoop out and discard the seeds and gel. Crush and tear the tomato flesh into the other large bowl.
Step 5
Begin multitasking. When about a quart of torn tomato pieces are in the large bowl, use both hands to smash and squeeze them. As the tomatoes break down, they will separate into a watery soup with larger pieces of pulp. The more the tomatoes are massaged and the solid and watery textures combined at this step, the less likely the contents of the jars will separate into tomatoes and liquid after processing.
Step 6
It is easier to reach the correct consistency by working in smaller batches. When you have about 4 cups of crushed tomatoes in the bowl, add them to an 8-quart or larger nonreactive pot and bring to a boil, breaking down the tomatoes further with a potato masher or strong wooden spoon. Reduce to a strong simmer and continue to hand-crush tomatoes in the large bowl and add them, 4 cups at a time, to the tomatoes in the pot, returning the mixture to a boil between additions. (Keep count of the 4-cup additions and prepare the number of jars needed: 4 cups is equivalent to 1 quart or 2 pints.) When all the tomatoes have been added to the pot, bring the entire batch to a rolling boil for 5 minutes, stirring continually.
Step 7
Ladle the hot crushed tomatoes into the prepared jars, leaving a 1-inch headspace (that is, an inch between the rim/underside of the lid and the food or liquid in the jar). Add 1/2 teaspoon citric acid or 2 tablespoons lemon juice to each quart jar. (Add 1/4 teaspoon citric acid or 1 tablespoon lemon juice to each pint jar.) If using salt, add 1 teaspoon per quart jar or 1/2 teaspoon to each pint jar. Using a chopstick or a similar tool, stir the contents of each jar, releasing any air bubbles. Before sealing the jar, double-check that a 1/2-inch of headspace remains, adding a bit more tomato if needed.
Step 8
Carefully clean the rims and threads of each jar with a damp paper towel. Check the rim with your fingertip dipped in white vinegar: It should be squeaky-clean. Place the lids and rings on the jars and finger-tighten the rings.
Step 9
Process in a boiling water bath for 45 minutes if using quart jars, 35 minutes if using pint jars. If processing both sizes of jars, boil for the full 45 minutes.
Let the jars rest in the canner for 10 minutes to help prevent siphoning (when the boiling ingredients bubble up under the lid, breaking the seal). Using a jar-lifter, lift the jars from the canner, keeping them upright, and place on a towel-lined baking sheet. (Do not use kitchen tongs to lift the jars.) Do not move the jars for several hours.
Step 10
When thoroughly cool, remove the rings and test the seal by lifting the jar by the flat lid. If it has not sealed, and only within 24 hours of the original processing, reheat the tomatoes and reprocess as before, including adding more citric acid or lemon juice. If the seal fails after 24 hours, or in the days and months following, discard the tomatoes.
Wash and dry the sealed jars, label and date them and store in a dark, cool place for up to 18 months.
Altitude adjusting: Because water boils at lower temperatures at higher altitudes, processing times should be increased to reach a safe temperature. From 1,000 to 2,999 feet above sea level, add 5 minutes. At 3,000 to 5,999 feet above sea level, add 10 minutes. At 6,000 to 7,999 feet above sea level, add 15 minutes. At 8,000 to 10,000 feet above sea level, add 20 minutes.
From food writer Cathy Barrow.
Tested by Ann Maloney; email questions to voraciously@washpost.com.
Scale and get a printer-friendly, desktop version of the recipe here.
Browse our Recipe Finder for more than 9,000 Post-tested recipes.
Did you make this recipe? Take a photo and tag us on Instagram with #eatvoraciously.
More from Voraciously:
The best summer tomato salads use just a few ingredients to generate big flavors
It’s everything but the bagel with this summer tomato tart inspired by a deli favorite
This bowlful of yogurt with roasted cherry tomatoes tastes like a luscious indulgence
Nutrition
Calories: 32; Total Fat: 1 g; Saturated Fat: 0 g; Cholesterol: 0 mg; Sodium: 9 mg; Carbohydrates: 7 g; Dietary Fiber: 2 g; Sugars: 5 g; Protein: 2 g.