How to make creamy ricotta at home in just 30 minutes
The beauty of fresh ricotta lies in its incomparable texture and versatility. But that beauty is fleeting: Fresh ricotta is best eaten within a few days of being made. The stuff sold in tubs has been treated for long-term storage, which negatively affects the taste.
As far as equipment goes, you’ll need a pot, a big spoon, a large colander and enough cheesecloth (or a clean kitchen towel) to line it. That’s it.
Before I go any further, I know that some smart reader will inform me this isn’t traditional ricotta. That smart reader would be right. Traditional ricotta is made using leftover whey from other cheesemaking projects (that involve starter culture and rennet), but since this is a recipe for home use (and we’re not exactly awash in leftover whey) this method is modified to create a few cups of fresh curds. And, yes, adding heavy cream is a wanton thing to do, but hey, 2020 has been rough and we could use a little luxury in our lives.
Scale and get a printer-friendly version of the recipe here.
If you don’t have heavy cream, that’s okay, too. Your ricotta will not be as creamy, but it’ll still be in a different league than store-bought. And if all you’ve got is reduced-fat (2 percent) milk, that will do in a pinch, though whole milk is ideal. Other milks, such as goat also work, but avoid ultra-high temperature (UHT) pasteurized milk as it doesn’t curdle properly. Read the label carefully before you buy.
As far as adding an acidic ingredient, you have choices: Some folks like adding distilled white vinegar, while others use buttermilk. I prefer the sunshiney brightness of lemon because it enhances the creamy taste of my ricotta.
Salt is essential. Without it, the ricotta won’t really have dimension; its creaminess will fall flat on your tongue and taste heavy instead of uplifting.
And let’s not forget the leftover whey. Don’t toss it! Instead, use it in place of water for bread or pizza dough, as an addition to smoothies, or as a base for vegetable soups in place of broth. As a last resort, you can use it to water plants.
As far as the cooking process, it couldn’t be simpler: Combine all the ingredients in a pot and bring them to a simmer until they curdle. Strain and transfer to an airtight container.
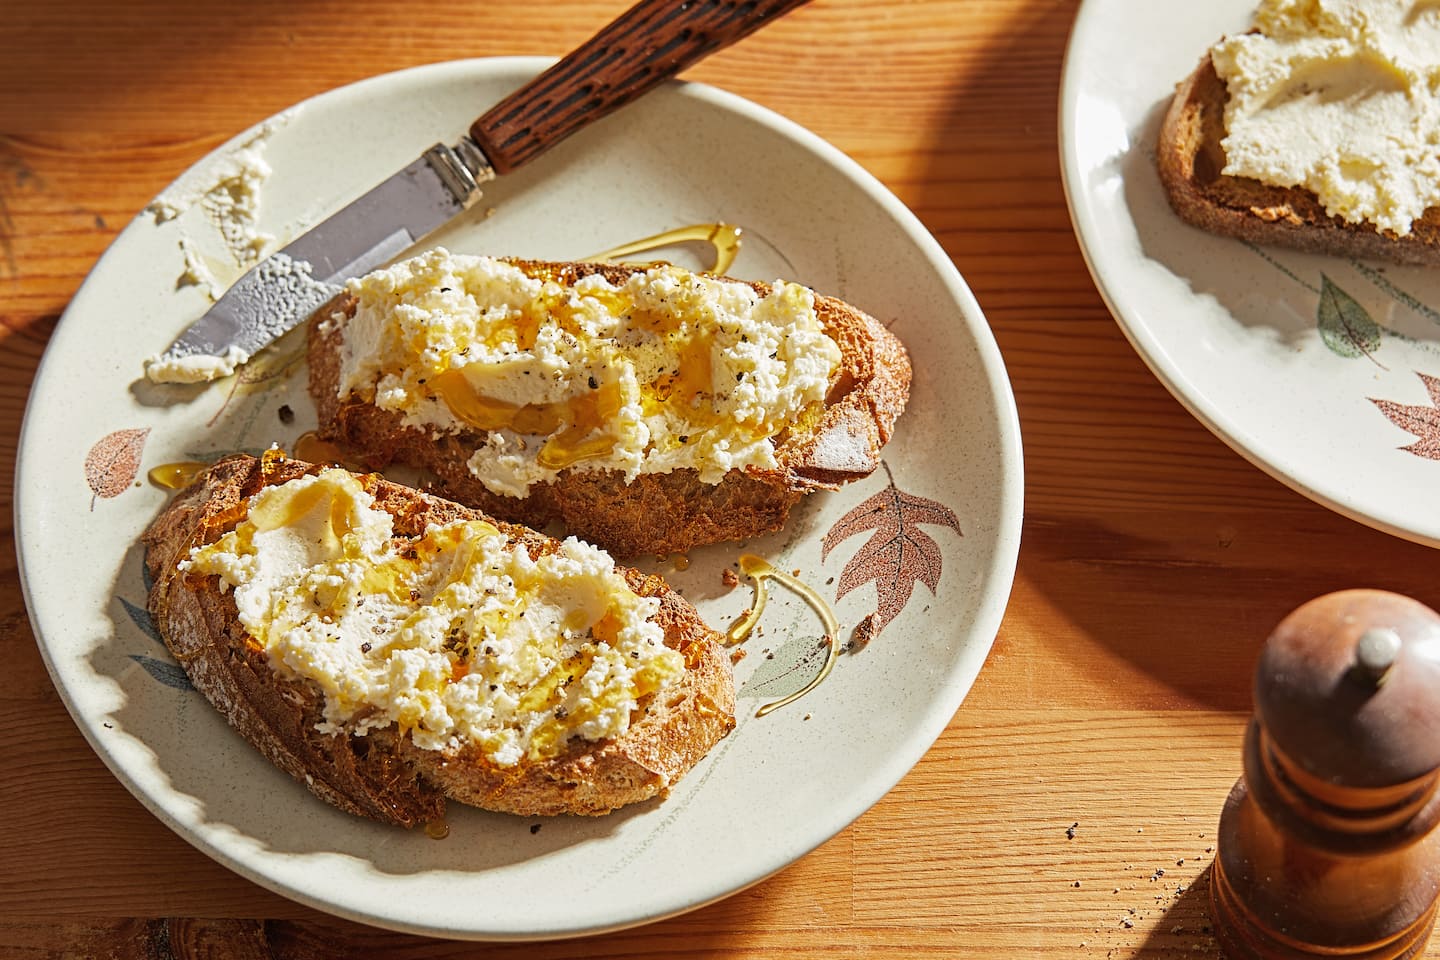
Voila, you now have creamy ricotta for ravioli, lasagna, meatballs, pizza, cannoli and so much more. How wet or dry it is is entirely up to you. Want wetter ricotta for spreading on toast or topping pasta or pizza, drain it less; want it firmer for meatballs or lasagna, drain until it’s firmer. (And remember, the ricotta will continue to firm up once refrigerated.) My favorite way to eat homemade ricotta is to spread it on a slice of crusty bread, drizzle it with honey and grate some black pepper on top. If I’ve got prosciutto on hand, it really gilds the lily, but it’s not necessary for a sublime tartine.
Another bonus: You control the amount you make. A gallon of milk will yield about a quart of ricotta; half a gallon results in about 2 cups.
Most often I make a batch when I need to use up milk approaching its expiration date. Older milk will curdle more readily so it’s an ideal way to make something new out of it. Which is exactly what I need from recipes in general, but more than ever as this year comes to a close.
Note: If you don’t have heavy cream, you can make ricotta as written below without it, but it won’t be quite as creamy.
Storage: Fresh ricotta, best within the first couple of days, and can be refrigerated in an airtight container for up to 1 week.
Ingredients
- 4 cups whole milk (not ultra-pasteurized)
- 1 cup heavy cream (not ultra-pasteurized)
- 3 tablespoons strained fresh lemon juice (may substitute white wine or distilled white vinegar)
- 1/2 teaspoon kosher salt, or more to taste
Step 1
Set a large colander over a large, deep bowl. Line the colander with a piece of 2 layers of cheesecloth wide enough to have a very generous overhang all around.
Step 2
In a large heavy-bottomed pot over medium heat, bring the milk, cream, lemon juice and salt to a lively simmer, stirring occasionally to prevent scorching. Continue to simmer until the contents start to curdle (they may start to curdle while the mixture is warming up, which is okay).
Step 3
Continue to simmer until the mixture completely separates, about 1 more minute. (For a firmer/drier ricotta, simmer for 1 more minute.) Remove from the heat and carefully pour the contents into the lined colander set over a bowl (save the whey, see NOTE) and drain until the desired consistency, 5 to 20 minutes depending on if you want creamy or dry ricotta. (The latter is great for adding to meatballs, for example, while the former is perfect for spreading on toast, or dolloping on or tomato soup.)
Step 4
Transfer to an airtight container and refrigerate until needed; the ricotta will firm up somewhat once chilled.
NOTE: Leftover whey is a great ingredient to use in place of water if you’re making bread or soups.
Nutrition Information
The nutritional analysis is not possible due to variable ingredients.
Recipe from Olga Massov.
Scale and get a printer-friendly version of the recipe here.